SBOM Management (Vendor)
16.1 Uploading an SBOM
From My Products, your Dashboard, or the SBOM upload page directly, click Upload SBOM.
- Link to Product (optional): select which of your assigned products this SBOM belongs to. Linking enables version history tracking and CI/CD automation for that product.
- Select a file: click to browse or drag and drop a CycloneDX or SPDX file (JSON or XML).
- Review the preview: once selected, the platform shows detected format, component count, file size, and any schema validation warnings before you submit.
- Submit SBOM: click to upload. A progress indicator shows while the file uploads and is scanned.
After a successful upload, the result panel shows the SBOM ID, format, file size, and scan status, updating automatically as the vulnerability scan completes — with a summary of critical and high findings once finished. From here you can View Scan Results or Upload Another.
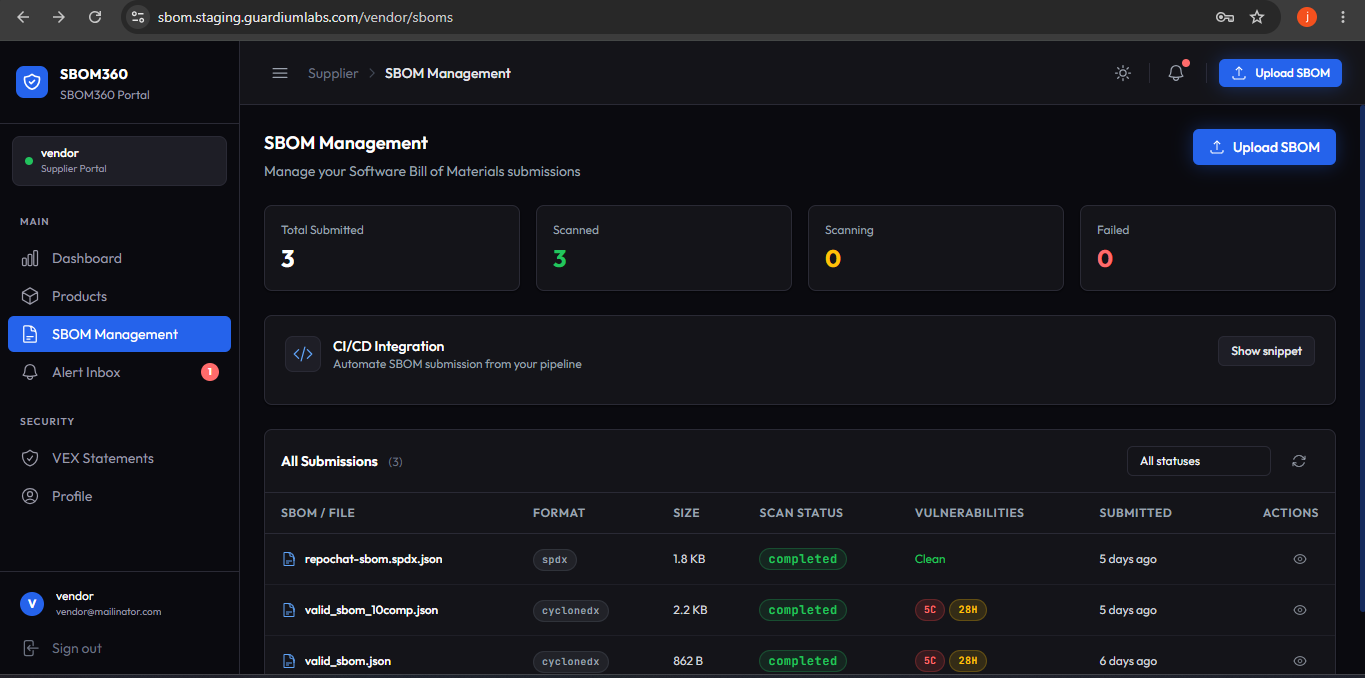
16.2 SBOM Submissions list
A running list of every SBOM you have ever submitted, each showing format, submission date, scan status, and vulnerability counts (or Clean if none were found). Click any row to open its full scan results.
16.3 CI/CD integration
Automate SBOM uploads directly from your build pipeline using an API token. From My Products, click Show snippet to reveal ready-to-copy GitHub Actions or GitLab CI configuration. Store your API token as a CI/CD secret named SBOM360_API_TOKEN (available from Profile → API Access), and add -F "product_id=
Note
The organization may configure SBOM requirements for your account — required format, update frequency, and maximum allowed vulnerability counts. These are shown on the SBOM upload page whenever they are set.